- Introduction
- Visiting in the Winter Time
- Step-by-Step Photos of the Construction Process
- Analysis and Suggestions for Improvement
- A Call for Support
- Additional Resources
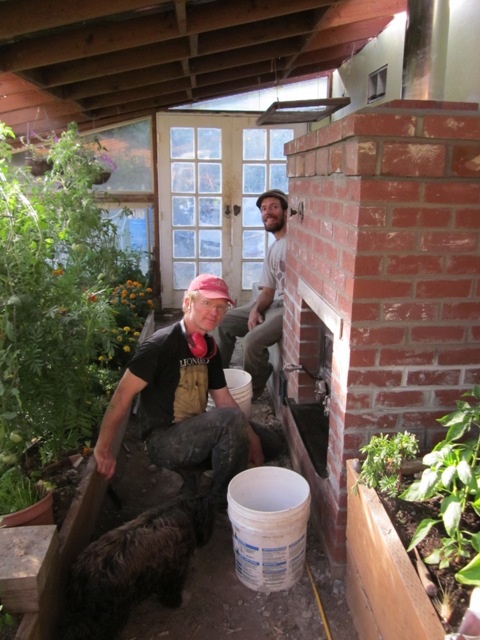
Kiko Denzer and I were hired to build a heater in a greenhouse for some very avid gardeners. They had experimented with using a wood stove but there simply wasn’t enough heat retained for the stove to heat the greenhouse from one day to the next throughout the winter. Our task was to incorporate the old wood stove, mostly taking advantage of the glass door and firebox it offered, and plug it into a system with channels and enough mass to absorb sufficient warmth to heat the greenhouse with one firing a day. This article chronicles that build and the results.
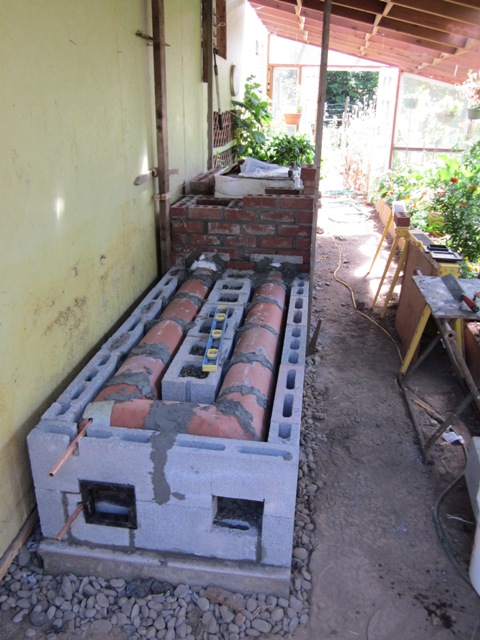
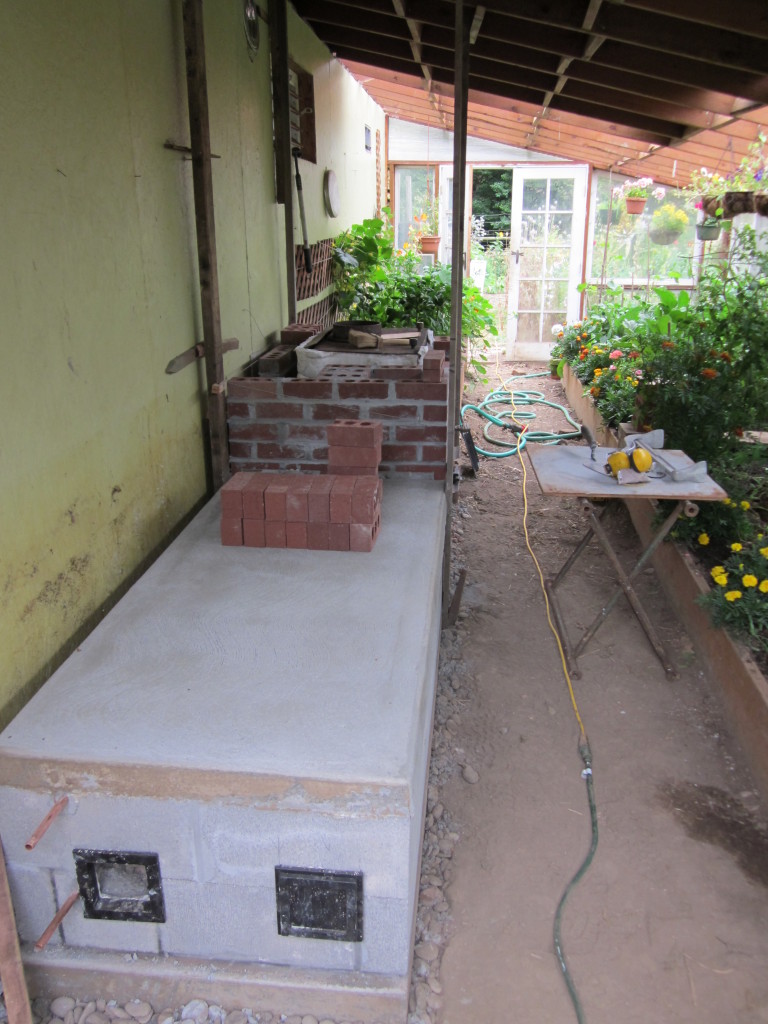
Here you can see the long path that the smoke makes through the bench after it has exited the original stove. Â All of the heat retained by the bench would have otherwise gone straight up the chimney. Â There is a bi-pass damper which acts as a valve and allows for a straight shot to the chimney when you are making cold start.
Visiting in the Winter Time
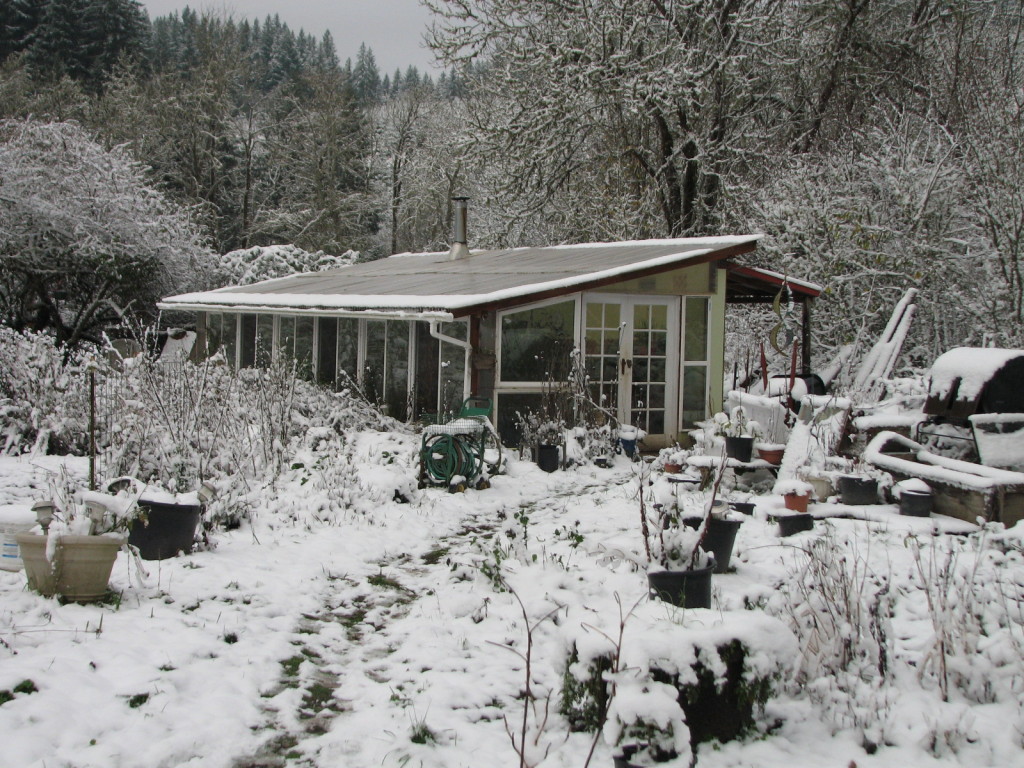
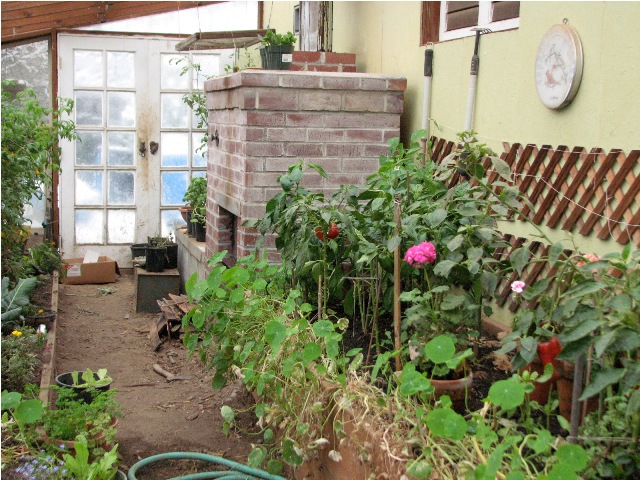
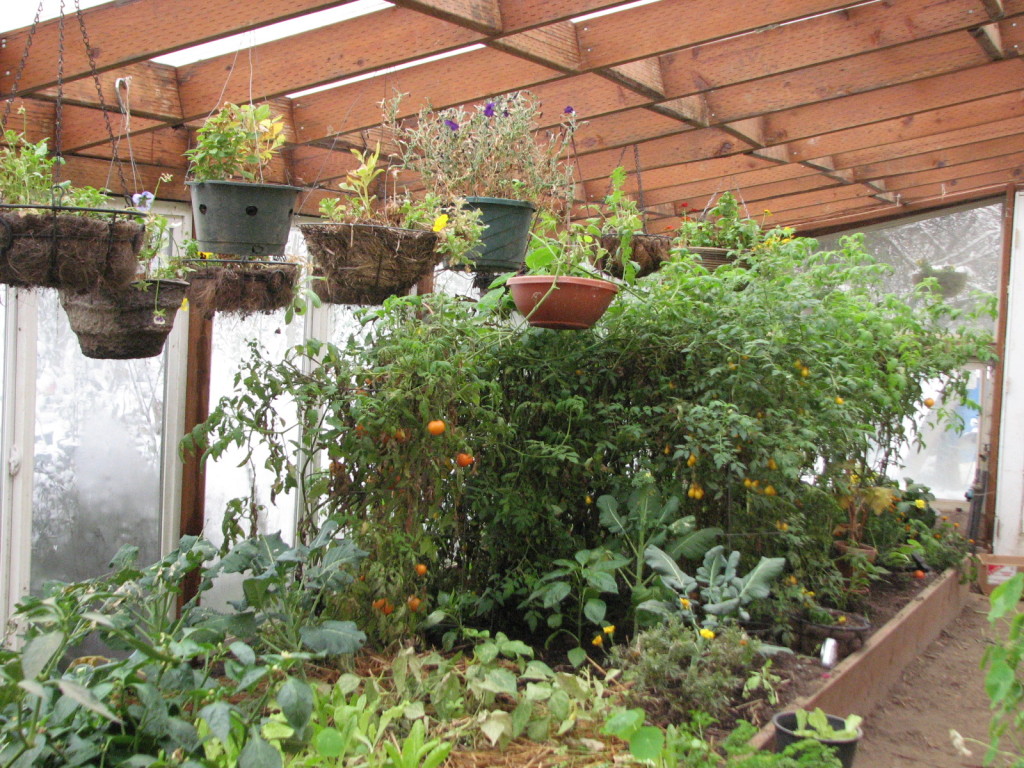
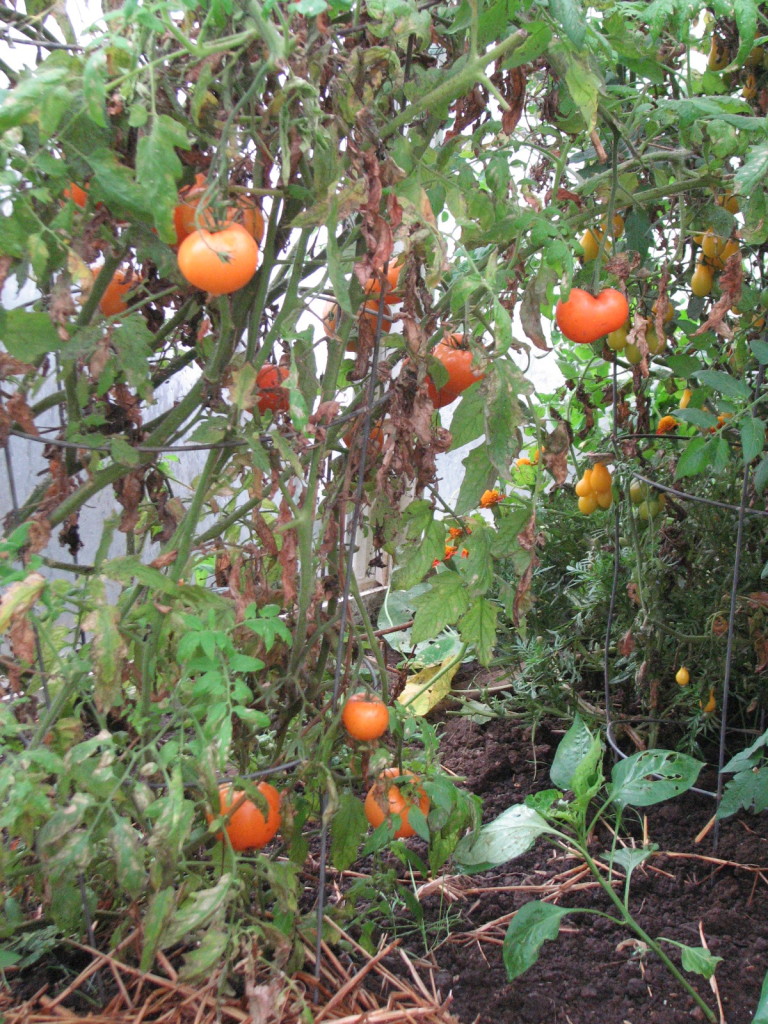
The following photos were taken on December 3rd in the Willamette Valley of Oregon. Â You can see tomato and pepper plants maturing inside the greenhouse while the ground outside is covered in snow.
Step-by-Step Photos of the Construction Process
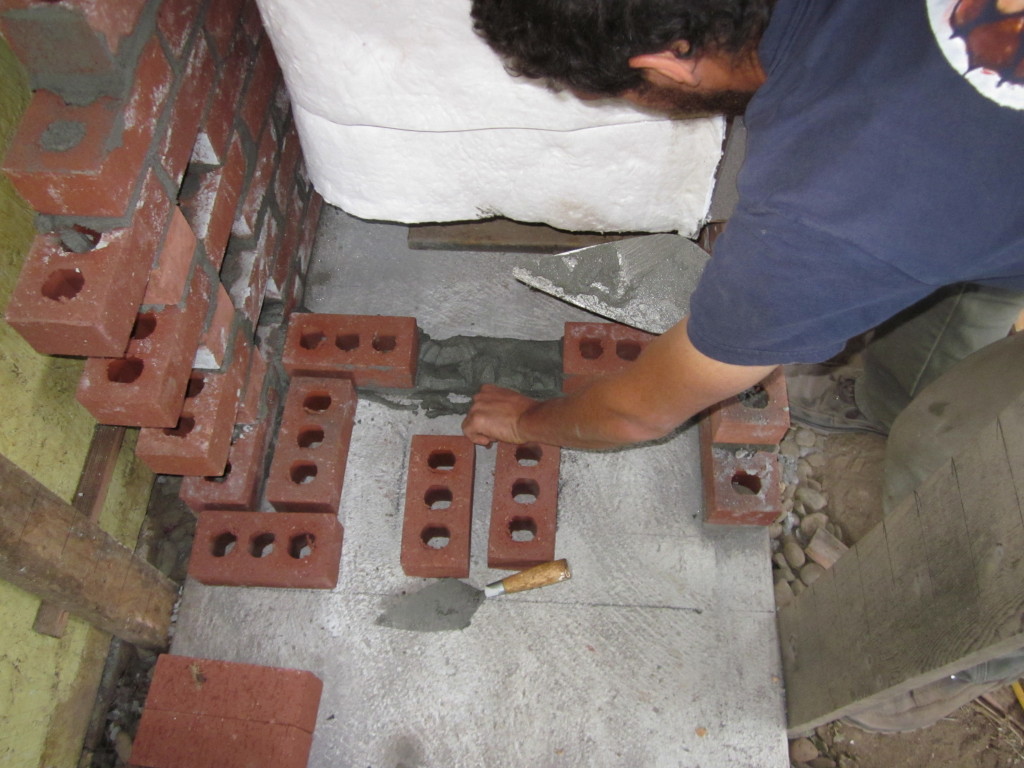
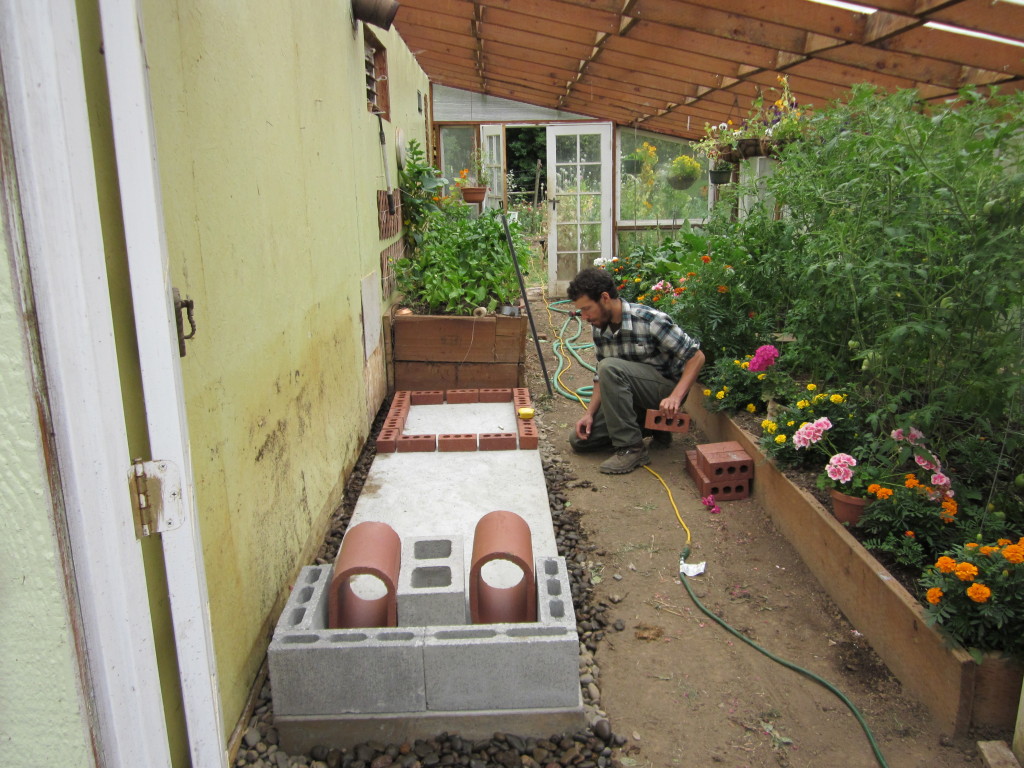 Dry lay-out. Â I had carefully drawn out the heater and we had poured the pad to planned dimensions… but it is always still important to check that everything fits together as planned.
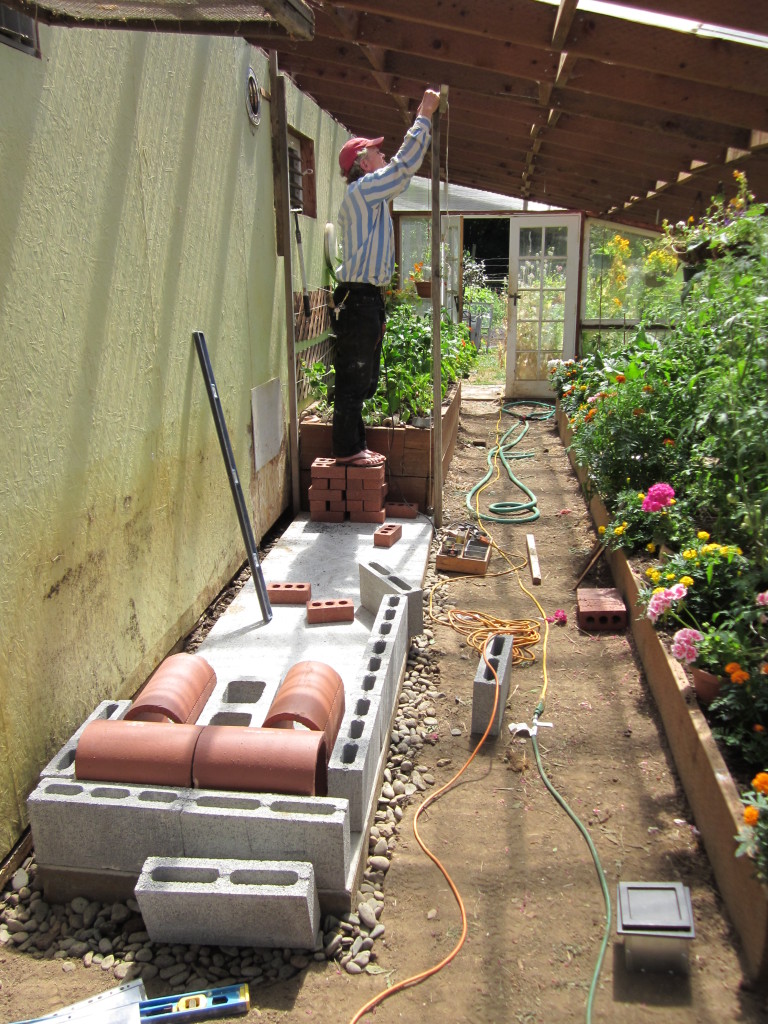 Kiko instals wooden guides, often called “leads”, that will help us to keep our corners plumb and allow us to run lines to level our courses. Â This is more helpful on larger projects.
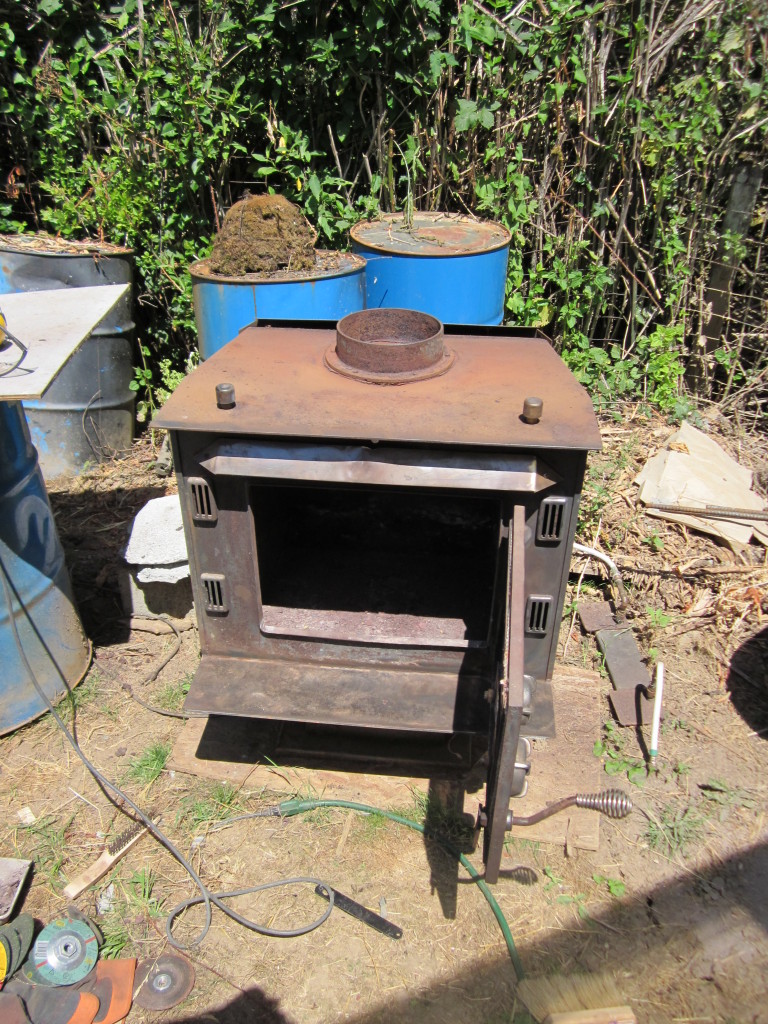 The original wood stove that inspired the project. Â I used a 4 1/2″ grinder with a metal cutting disk to cut out the baffle shelf it had inside.
 We laid up as many courses as we could behind the wood stove before moving it into place because we knew we wouldn’t be able to get there to work once it was there.
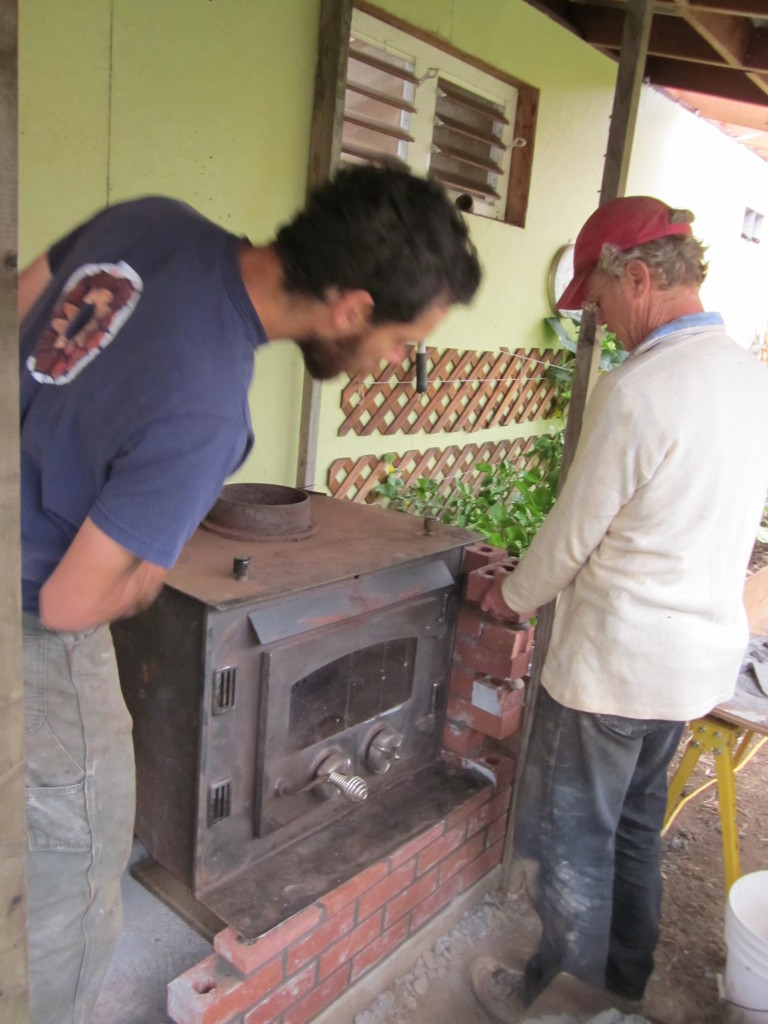
Now we have placed the wood stove which will act as our fire box. Â We are examining how the linteled course will go.
 You can see in this picture and the subsequent one that we have wrapped the stove in 1″ ceramic wool blanket. Â This is both to ensure that the metal stove has adequate room to expand and contract within its new brick housing and also to raise temperatures in the firebox which will contribute to a cleaner burn. Â In this photo, we are beginning to fully enclose the stove with brick and beginning to define the down and up-draft channels that will enter into and leave the bench.
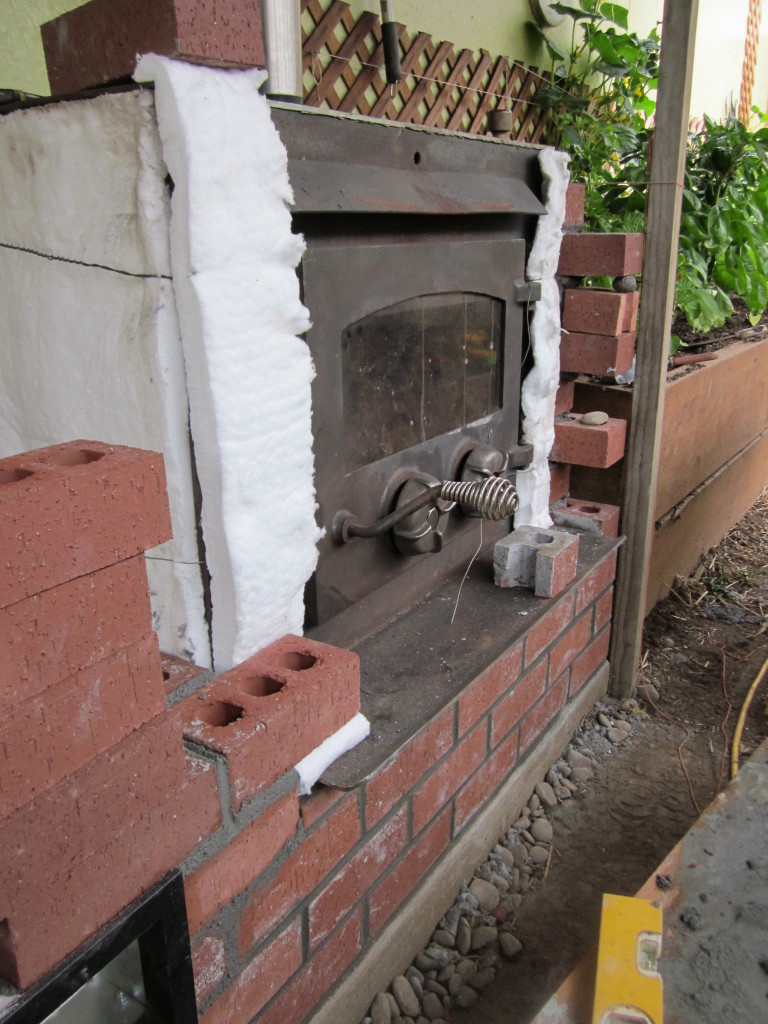 Detail of the creamic wool and brick work surrounding the stove.
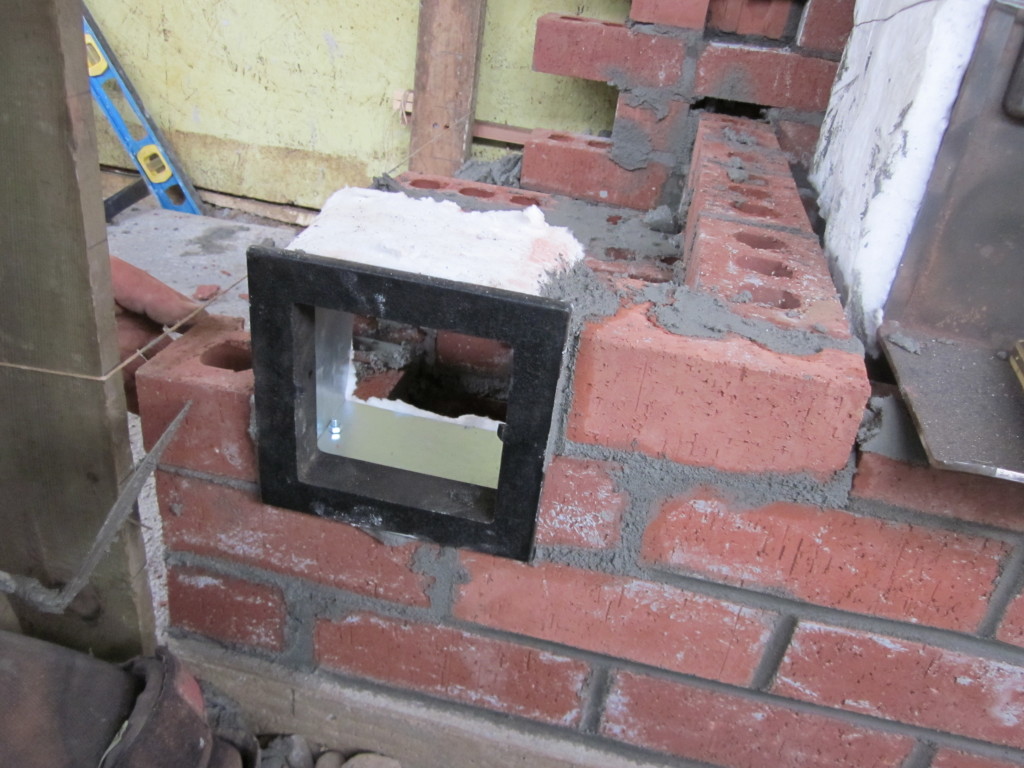 A cleanout is being installed at the bottom of the downdraft. Â We are using a soot door by Pisla and a masonry frame that surrounds it.
 The down and up-draft channels getting further defined. Â Lintels to span the openings.
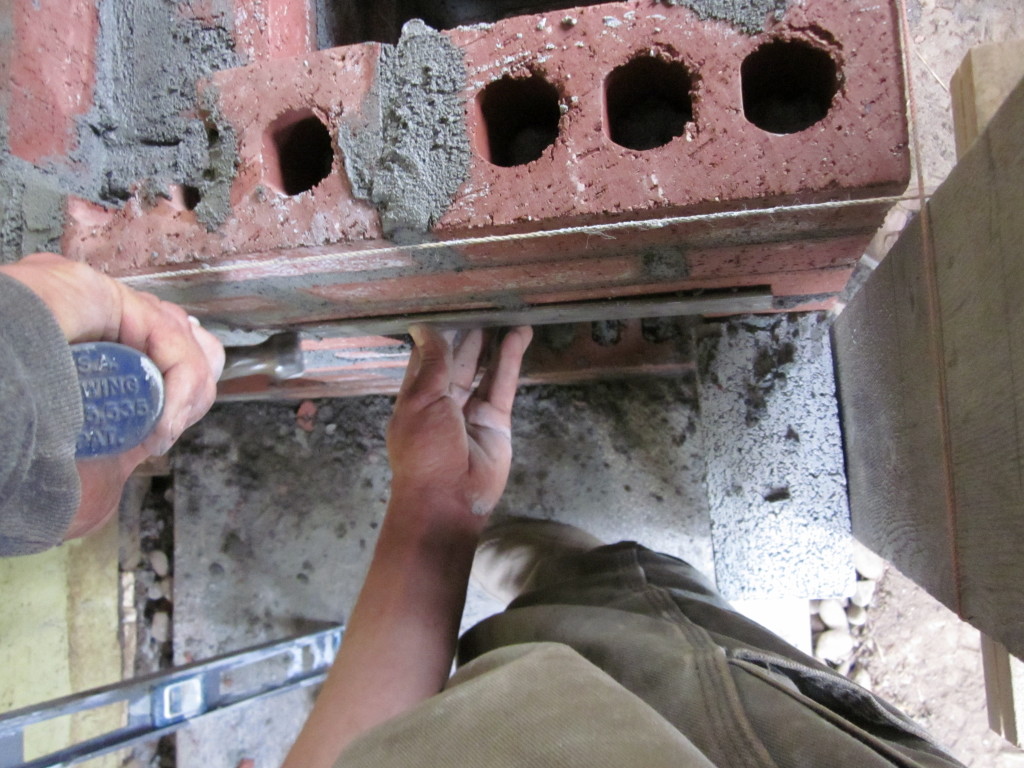 Before the mortar has set up, we knock the lintels back and forth at least a quarter inch to ensure that they will have room to expand and contract when heated.
 Project coming along. Â We have gotten above the height of the bench so….
 We switch gears and focus on the bench. Â A rare shot of Kiko using cement mortar! 🙂 Â The area the greenhouse is in experiences occasional flooding so we built the first couple of feet with cement based mortar and made some weep holes in the brick work.
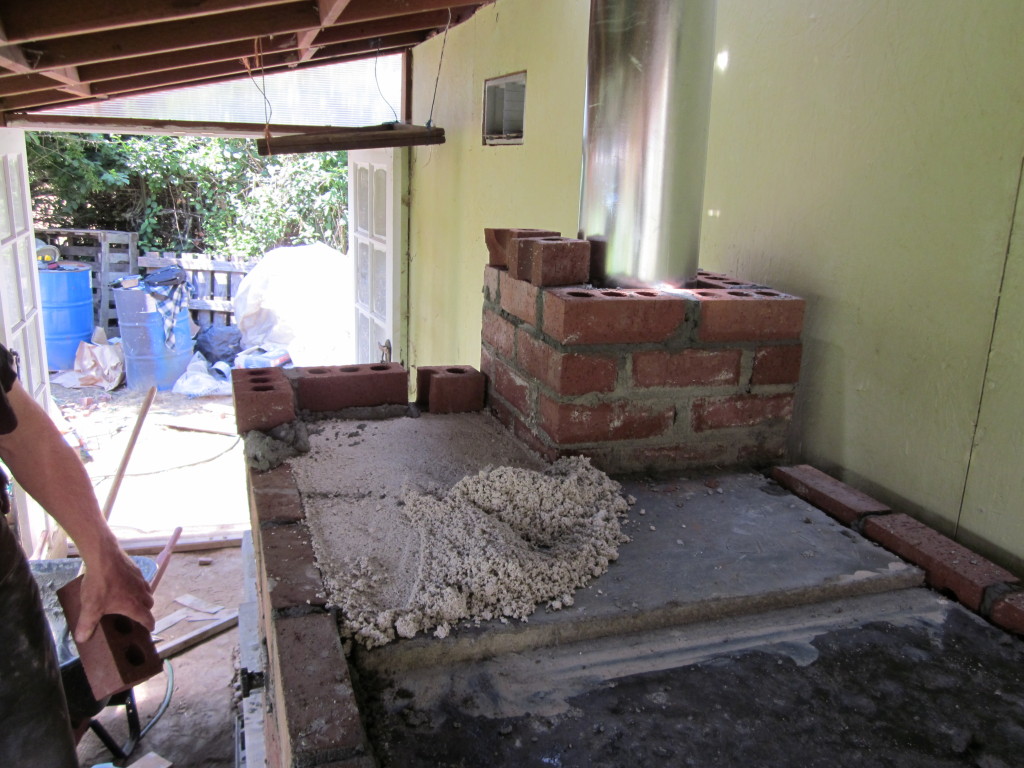
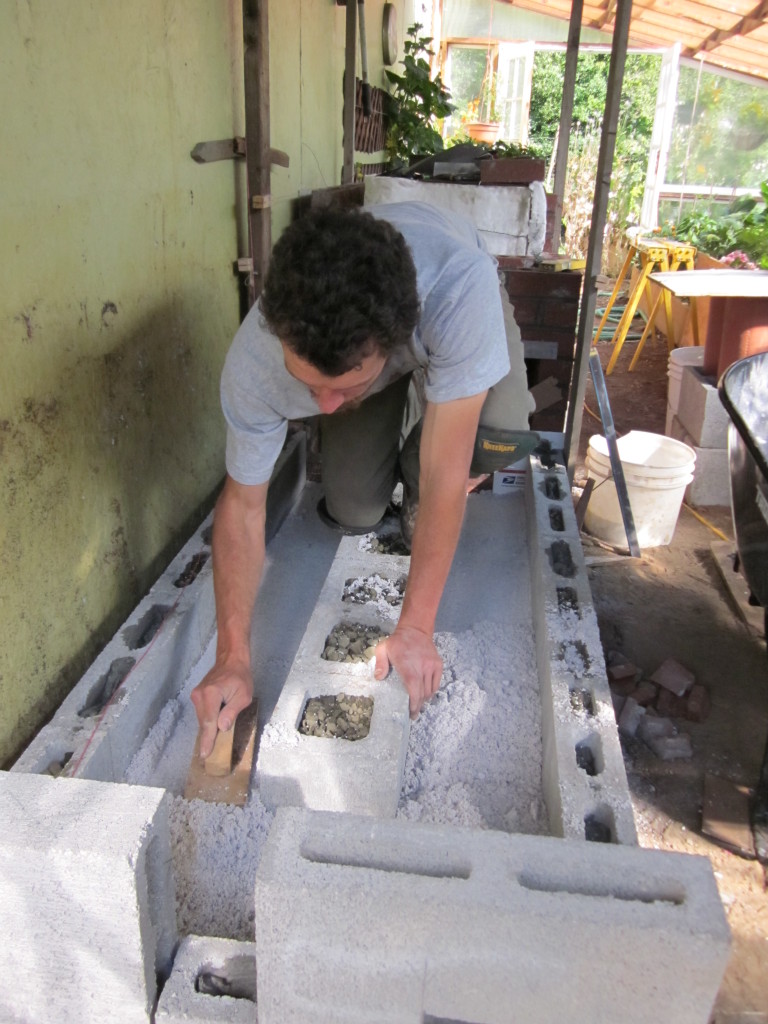 We chose to insulate the bottom of the bench channels (with a perlite-lime mix) so that less of the heat would soak into the pad and ground below it and more would go into the bench top.
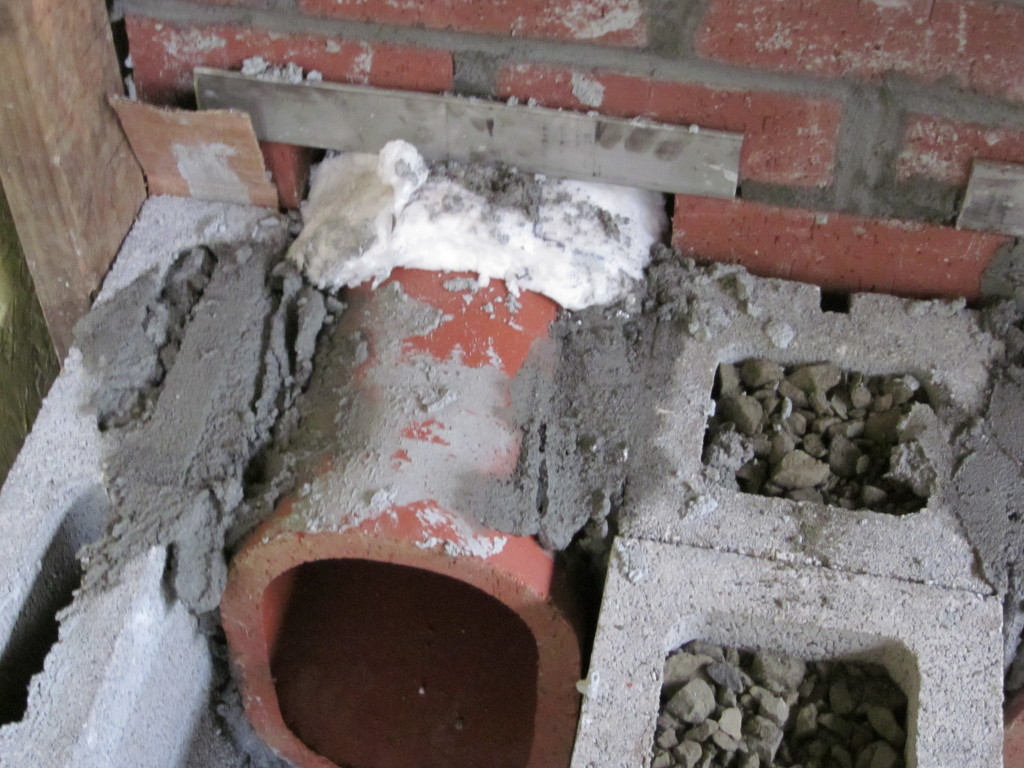 Detail of first flue liner plugging into brick work. Â We used ceramic wool to help seal the union while giving the two different materials room to move when heated.
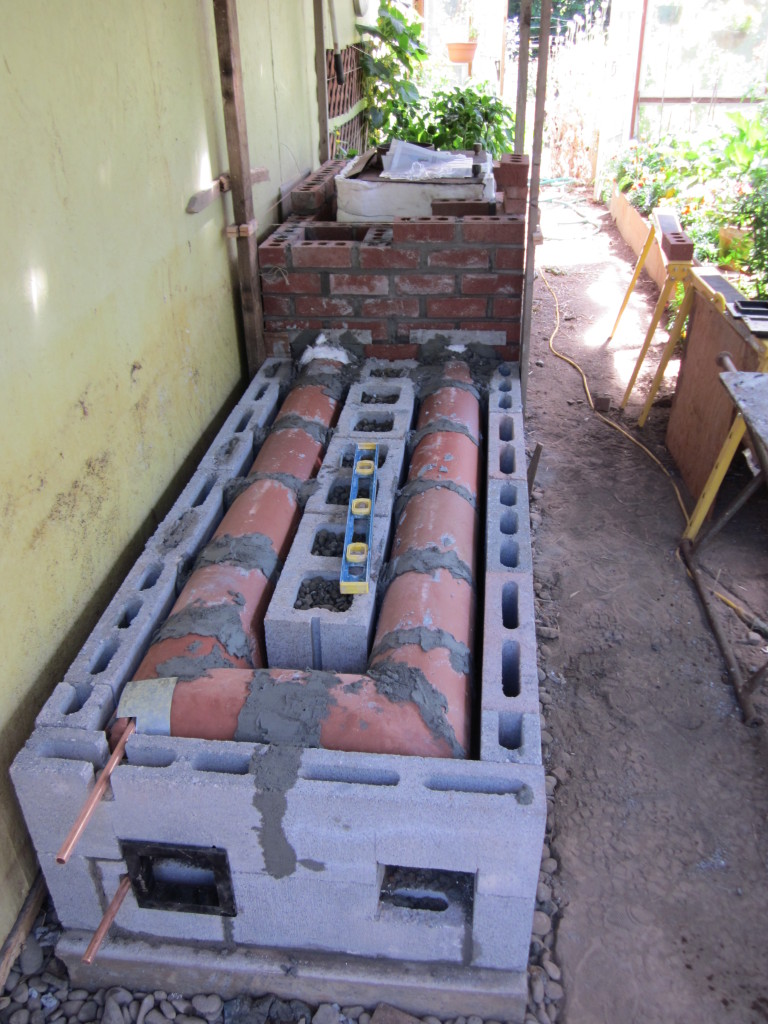
 The flue tiles are mortared to each other but very minimally mortared to the bench surround.
 I’m not sure why we hadn’t set up the brick saw. Â Cutting block with a diamond blade on a skilsaw can be a dusty and noisy affair so put on your safety gear.
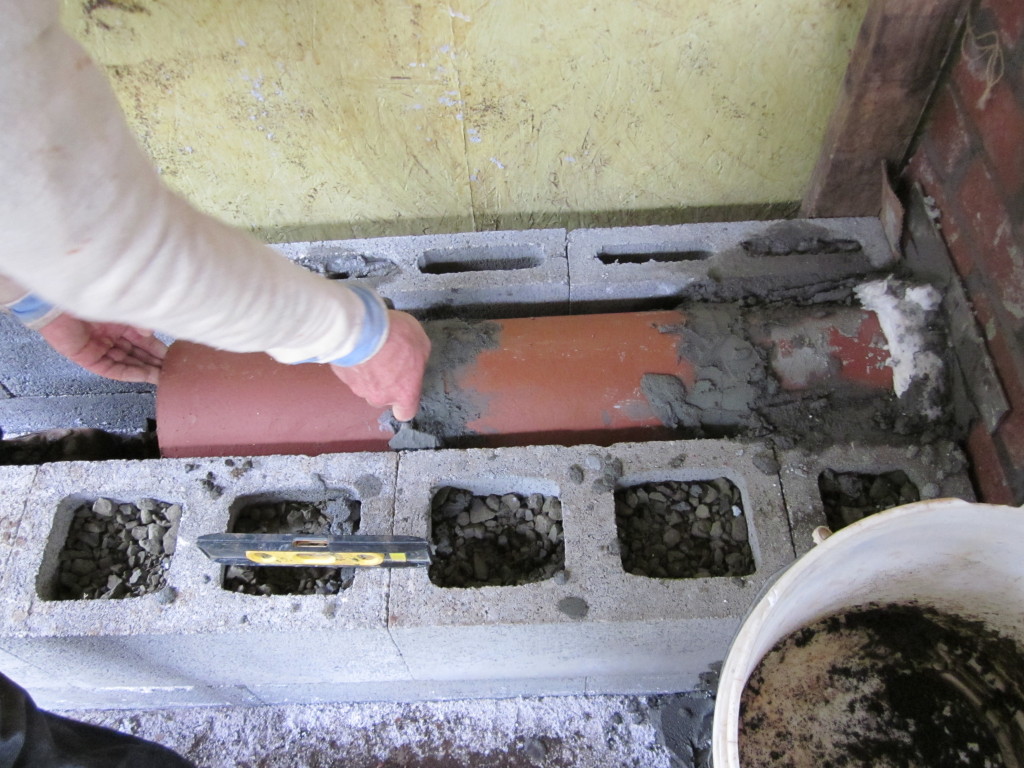
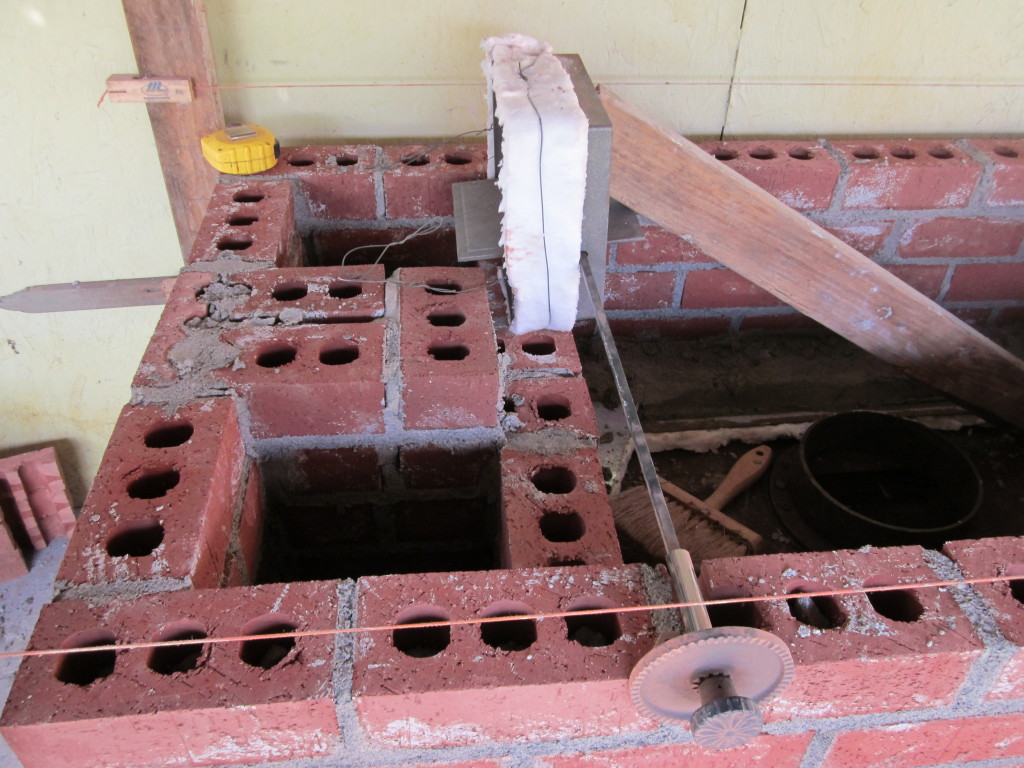
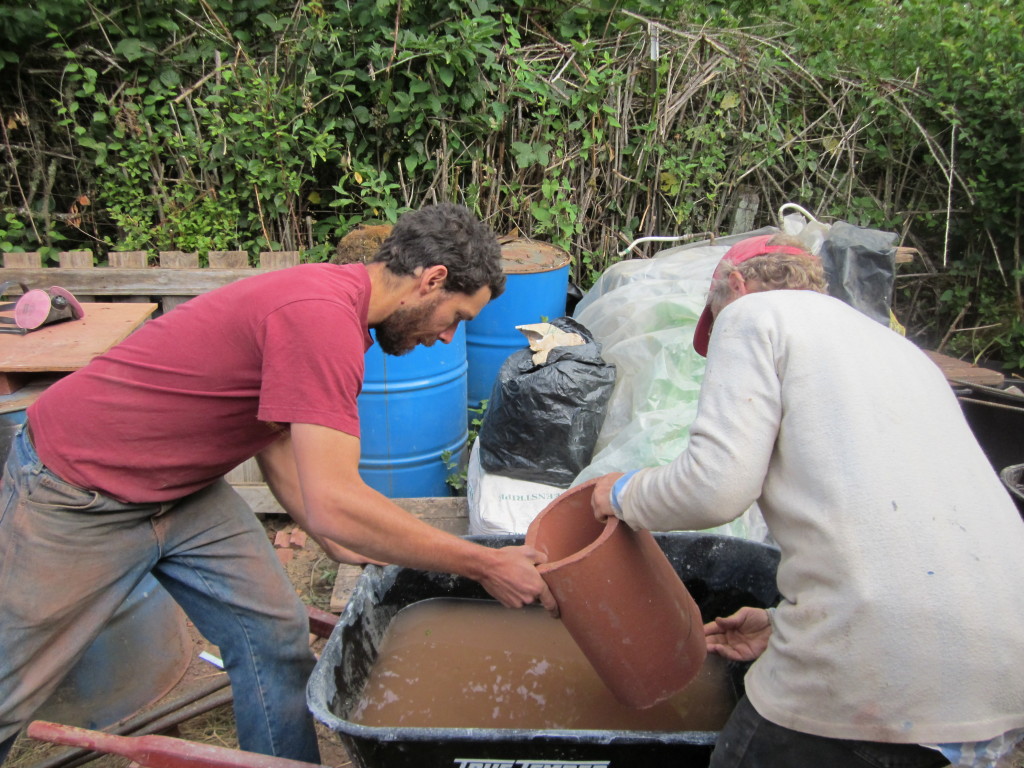 The next couple of photos show us marking a flue liner for an angle cut using water in a wheel barrow to give us a mark all around the shape.
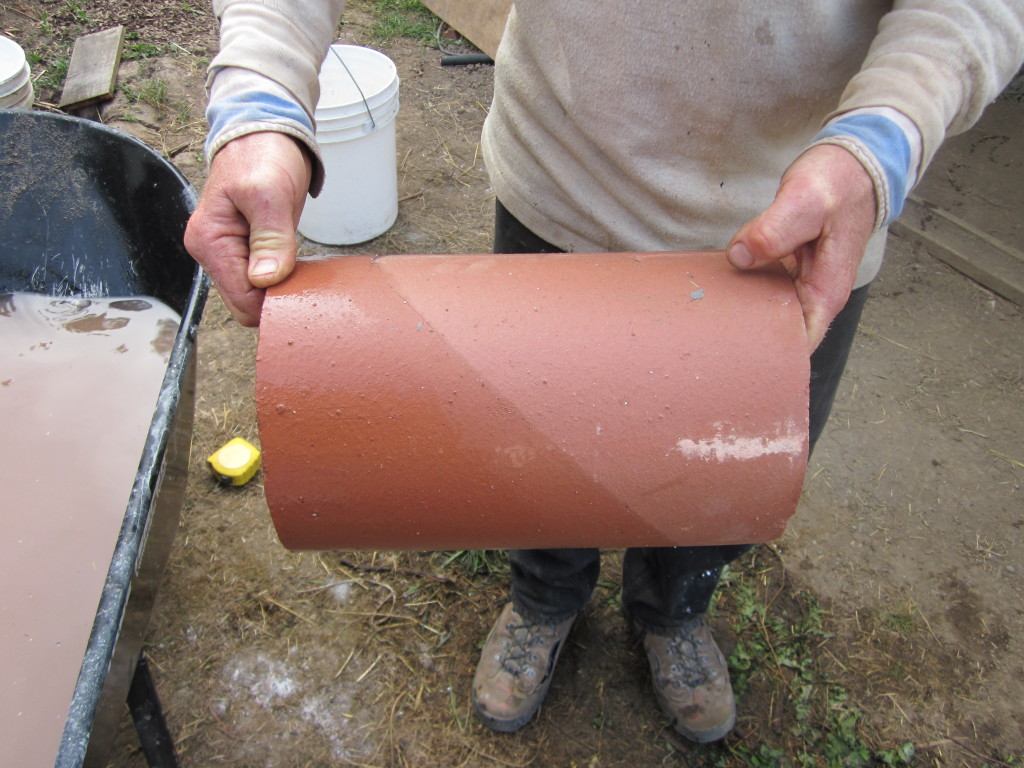
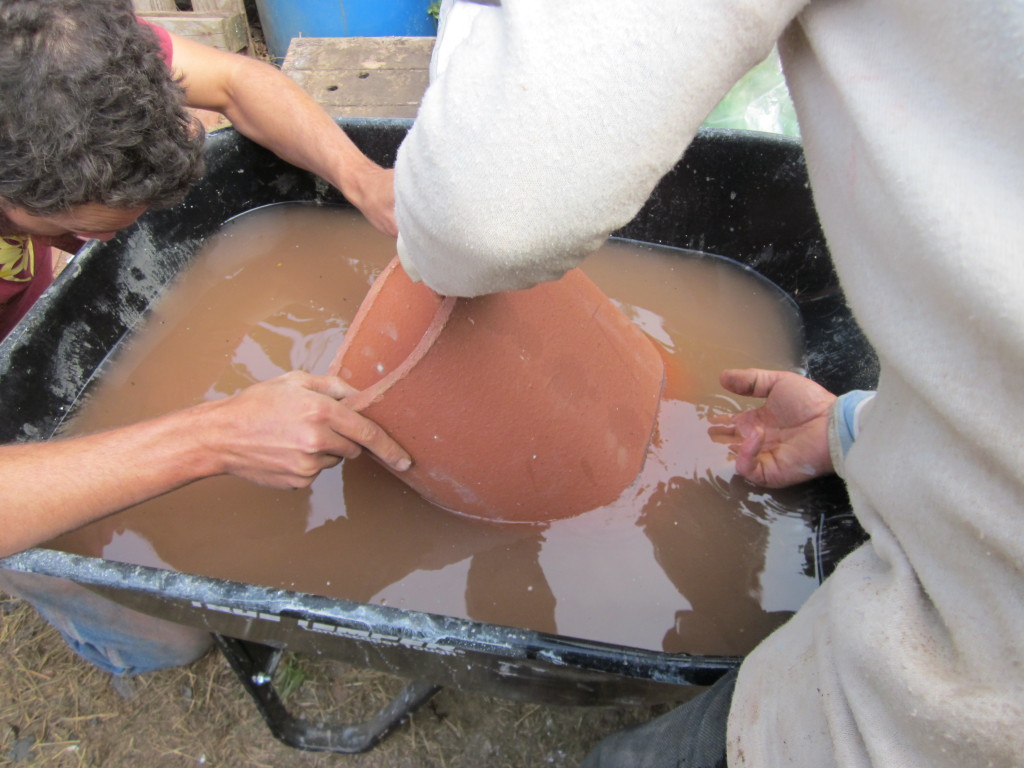 Each bringing the flue liner down to our marks.
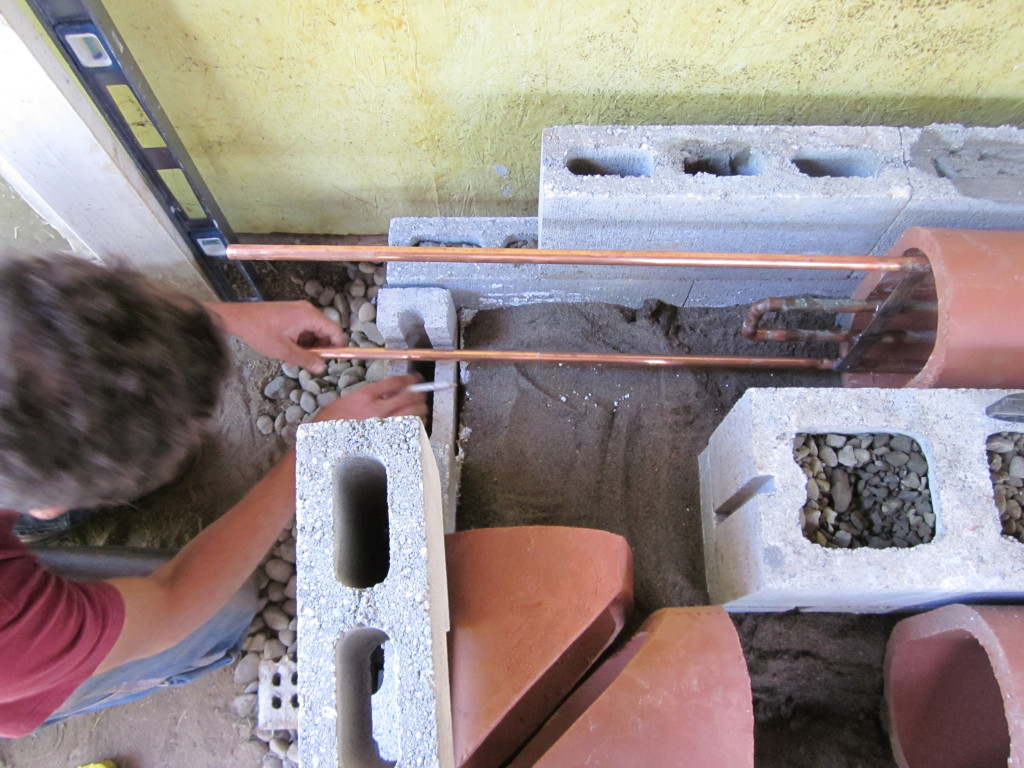 Working out the corners and also inserting the copper heat exchanger that Ed had made to warm water up for watering starts and seedlings.
 Flue liner assembly is completed. Â Cleanouts at end of bench to access both horizontal runs.
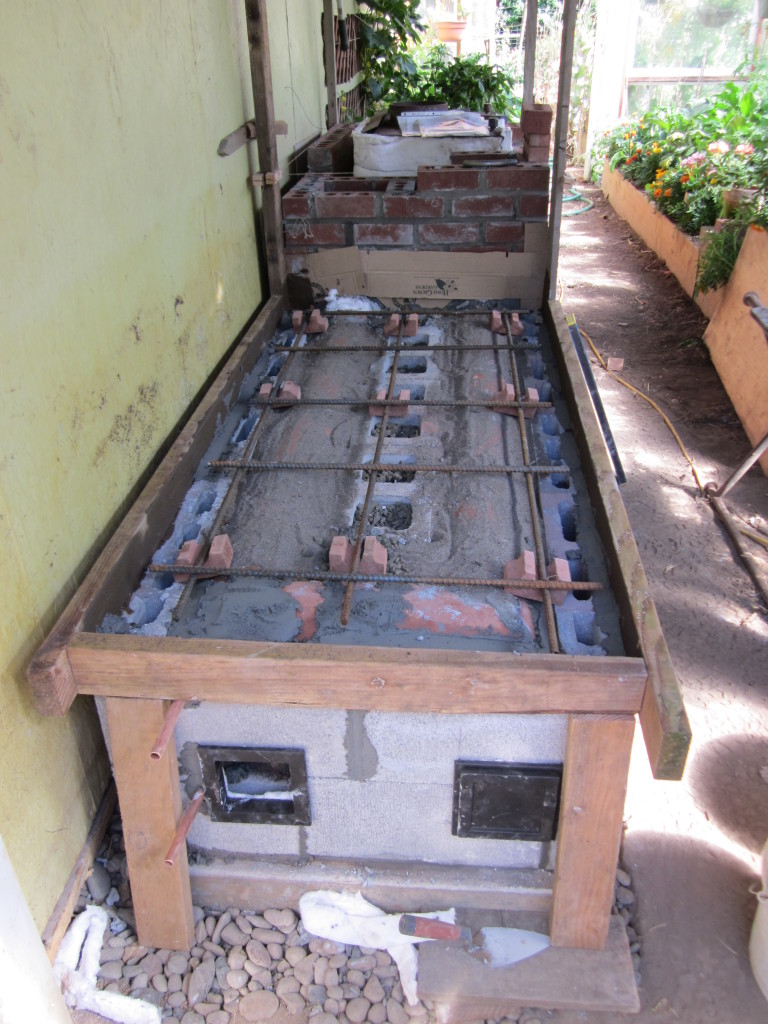 Framing up and reenforcing the concrete pad which will act as the bench top.
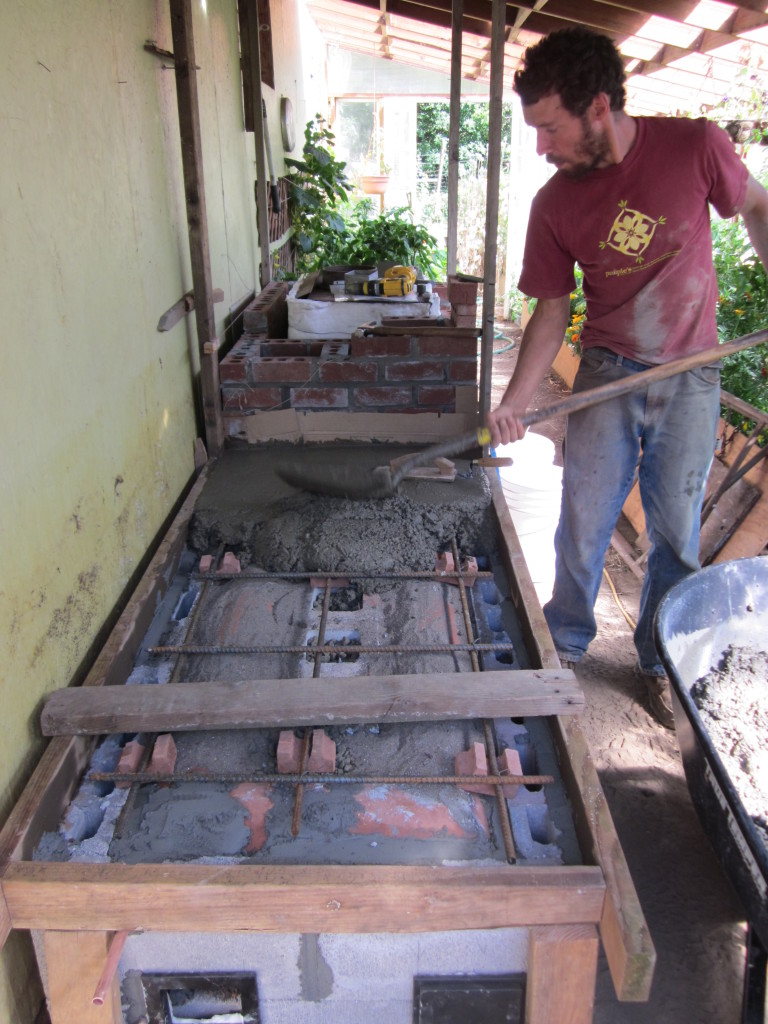 Mixing concrete, shoveling, and screeding.
 Bench completed, back to brick work.
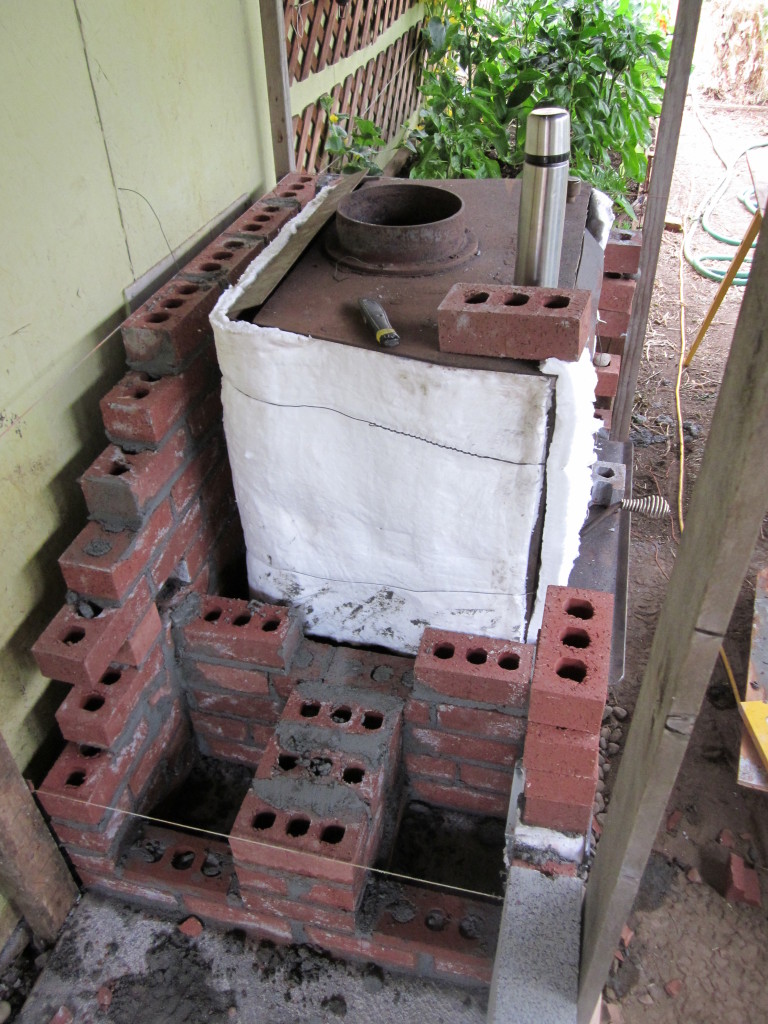
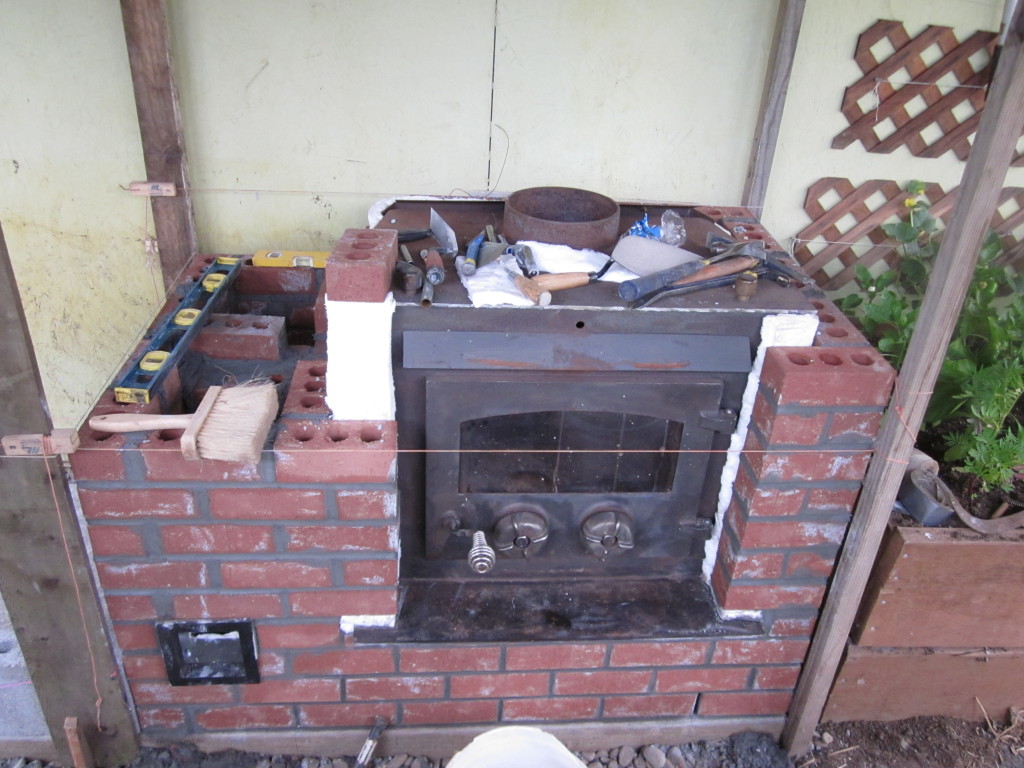
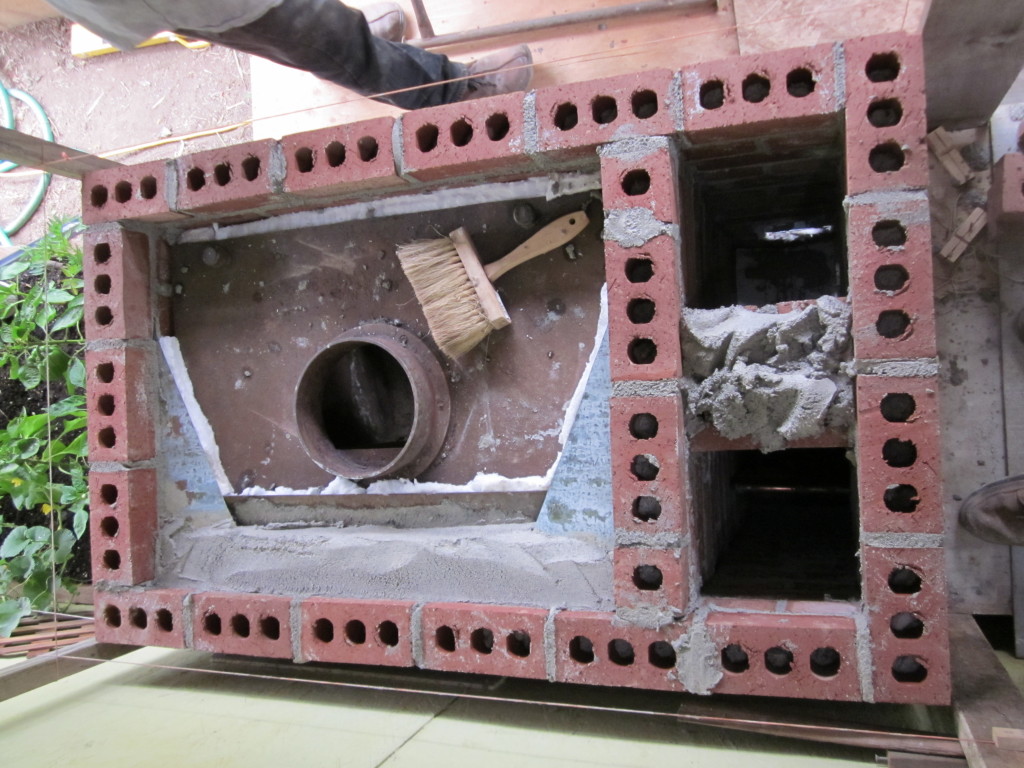 This is an important photo which shows the basic design. Â You can see the firebox and the bell that will be formed above it, and the down and up-draft channels. Â The heater has been designed around the size of the brick units to minimize cuts and complexity.
 The bi-pass damper is put into place. Â When open, it gives the flue gases a direct shot up the chimney.
 Another angle on the bi-pass damper and the shaft which leads to its operation on the front face.
 You can see the lintel above the firebox as well as the bi-pass damper handle.
 We have used slabs made of castable refractory to cap off the “bell” above the firebox and the entrance into the downdraft. Â An anchor plate with a shut-off damper has been installed for the chimney to plug into.
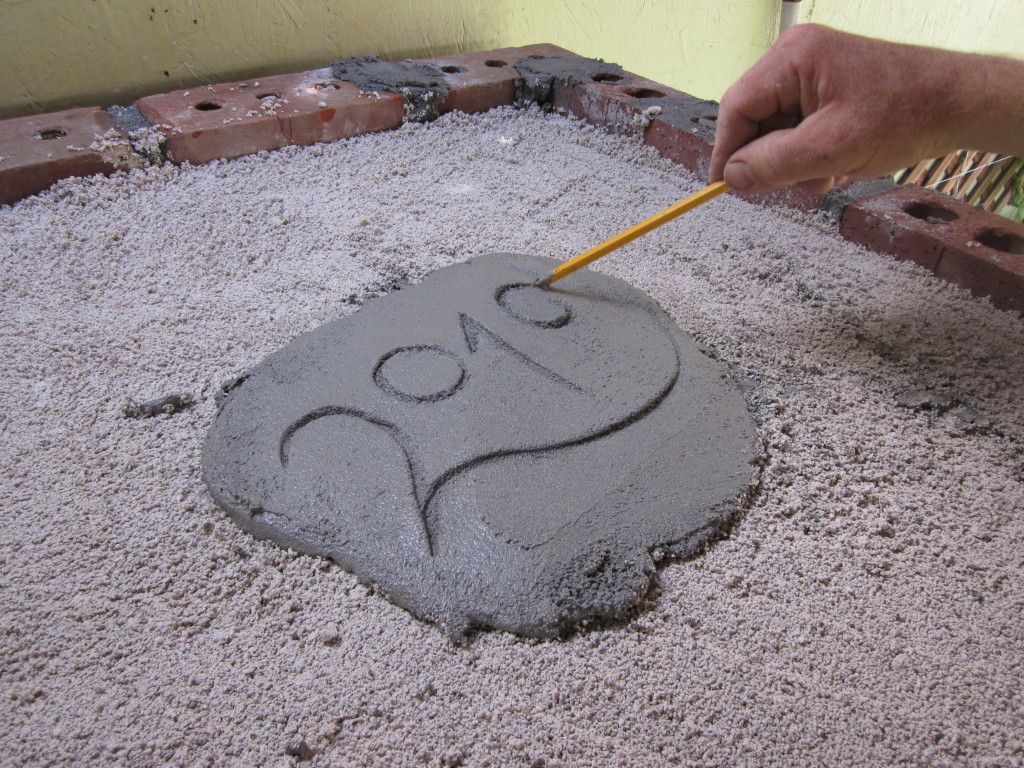 AÂ plaque made of left-over mortar to record the year in which it was built.
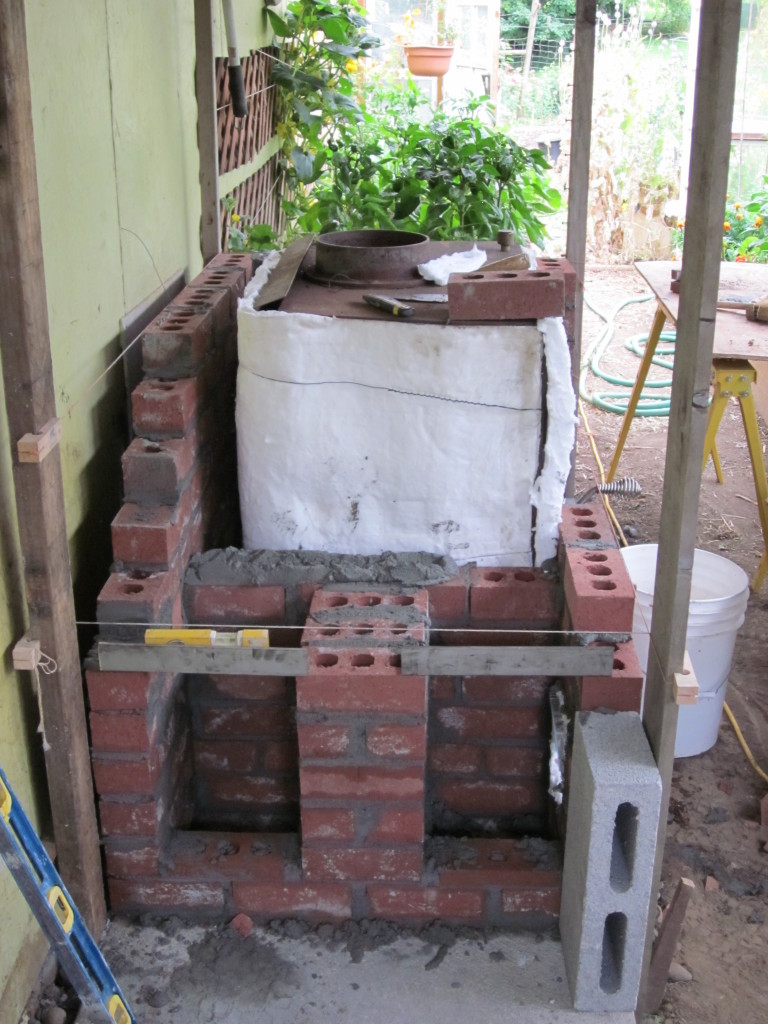
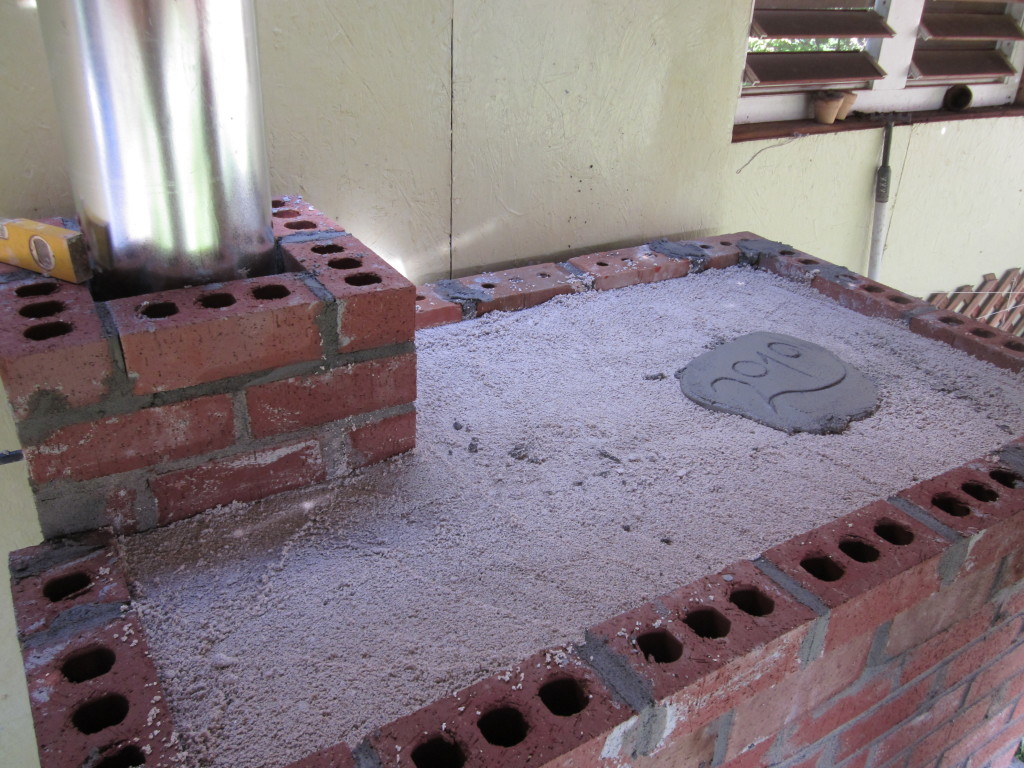 The top of the heater is insulated with a perlite-lime mix in order reduce the amount of heat accumulated at the top of the heater and encourage it to absorb it into the rest of the heater.
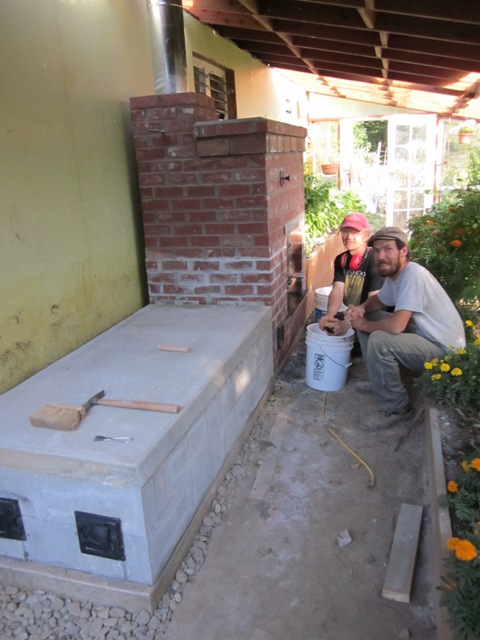
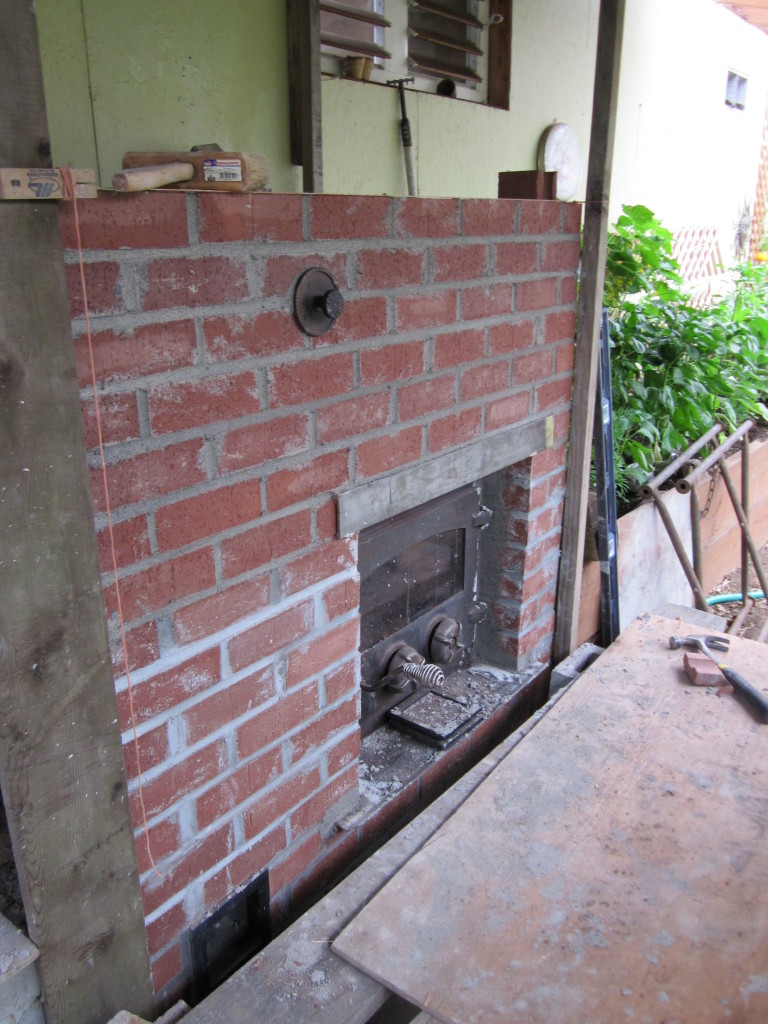
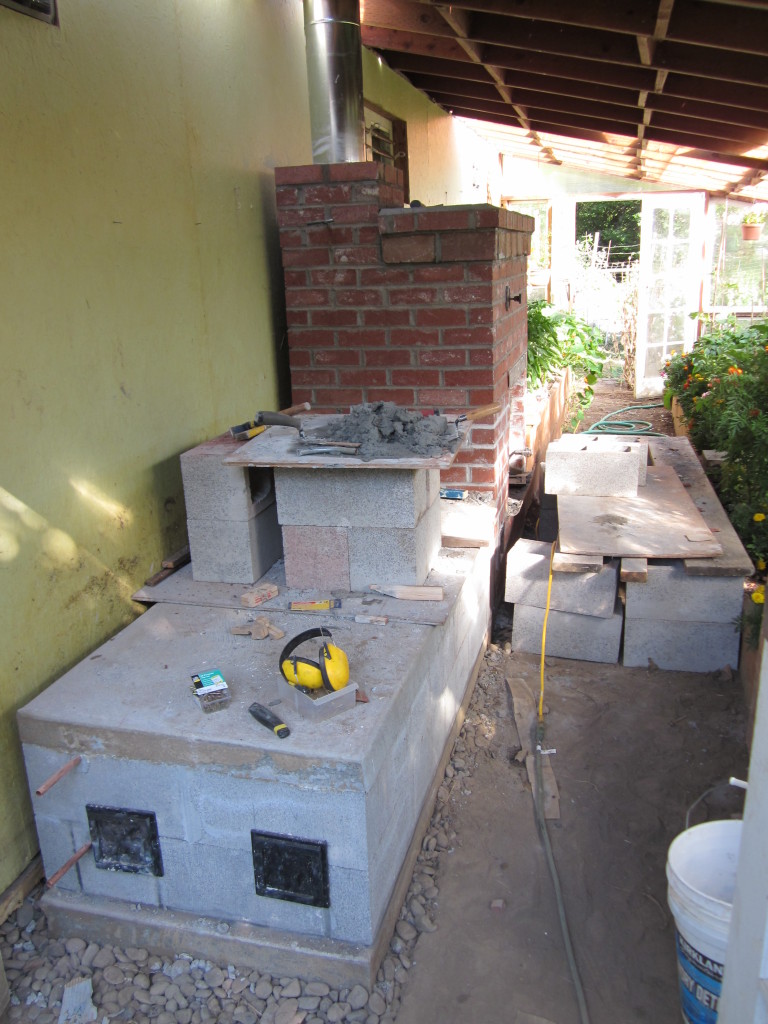 The heater is near completion.
Analysis and Suggestions for Improvement
When we went back to visit, Ed was thrilled about how the heater was performing. Â He expressed that it is a huge commitment to keep the heater fired once a day through the winter but that the results were compelling, both for extending the season as well as getting a head start on the next one. Â He said the seedlings literally jumped out of their flats when started on the heated bench.
We went through a firing cycle with him and my main reflection on the heater was that the original steel stove we had used to power it was probably it’s biggest limitation. Â The firebox is small for a batch-style heater where you want to be able to put all your fuel for a 24-hour period in at once (or, at worst, in two batches). Â The stove’s firebox is not at all optimized for combustion…. it is basically a box with a hole at the top which is inferior to a higher firebox and throat where the flame and gases have more opportunity to mix.
A clear improvement both in terms of optimizing combustion and longevity would be to build a firebrick firebox and mount a door. Â A good precedent for this modification would be the basic Gymse heater pattern developed by Lars Helbro. Â The main question for someone considering this project would be whether this additional cost and expertise would be a deal-breaker for the project happening.
A Call for Support
If you have read through this article and reached this point, it’s likely that you have interest in this subject and can appreciate what it takes to conceive of, realize, and document a project like this one. Â If you feel moved, you might….
Make a Contribution to Handprint Press
to encourage more well-written DIY articles!
Additional Resources
We don’t know of many other precedents for mass heaters in greenhouses so please let us know of other experiences and online resources.
- Gymse-
- Lars Helbro’s website – lots of inspiration, hopefully more details to come.
- An MHA build that shows the basic pattern of a Gymse, but is confusing because it also tests drafting smoke downhill.
- Rocket Mass Heaters in Greenhouses – I don’t think that the original iteration of the rocket mass heater is right one for “powering” greenhouses because its small, albeit efficient, firebox would require more attention than likely possible for a greenhouse and because of potential for smoke backing up and filling the greenhouse. Â The new batch-style rocket mass heater, which is similar to masonry heater design, featured in the case studies of the 3rd Edition of Rocket Mass Heaters does have some promise for this use.
So grateful for this article. I was looking specifically for a way to heat a greenhouse and water through winter. Your article really answered all those questions. Here’s another: If I have an attached Walipini/greenhouse can a rocket mass be shared for heat and hot water? Or two separate heating systems?
Thanks, Jacqueline, glad you found your way here. Have you discovered the rocket stoves experimenter’s corner at donkey32proboards.com? There’s a lot of knowledge, info, and advice there. Heating water is definitely do-able, but can be tricky — and dangerous, if it’s a closed/sealed system. Shared or separate depends on your needs and heater design, etc. Good luck! I’d be interested to hear more about what you decide to do…
Hey there,
I’m curious to see if your solid mass heater/ fireplace is still working. Or, if not, how long did it last? Was it as efficient as expected? Were there glitches? Would you change anything if you had the chance to build a new one?
Let me kbow.
Thx. =]- Meeschko
Hi, Michel, last I heard (a year or two ago?), the owner was gardening so much less that the greenhouse didn’t warrant heating. Aside from that, I think the heater did a good job — ripe tomatoes for Christmas (see here). Changes, hmmm. Hard to say. Depends on so many variables. The client had an old stove and wanted to use it. It made some parts of the build easier, some harder. Did it save the client any money? Short-term, yes. Long term, maybe not. There’s no such thing as perfect. (Or, if you look up the etymology of the word, you’ll find that it just means “thoroughly made” — which is what it’ll be when you’re done.)
I am looking for details about your product place lave me a message.whenI post this, I am looking for more information on this.
for more info, please go to firespeaking dot com
Very cool, Thanks for sharing.
I wonder how an auto feeding pellet stove could be used for one of these. That would eliminate the daily firing up the stove. the thermostat would be the trick because of the delay in heat transfer. It might over heat waiting for the thermostat to register ambient temps.
But a ton of pellets is pretty cheap and easy, cleaner than handing wood. no hauling wood every day.
Thanks again for posting this! you guys are awesome!
Pellets are made for producing smoke, not heat. They will produce heat, but much lower than wood. If you don’t want to bother with wood, want easy to use and cheap maybe a propane heater is for you.
I am wondering if there is any problem with pouring the concrete directly on top of the clay flue liners? Seems like you would need to break the bond so they could expand and contract at different rates? But I really like the idea.
Do you think there would be any problem with forming the sides and pouring concrete for the sides and top at the same time? I think this would be a great way to make a bench.
I have always been concerned that rocket mass heaters would have poor chimney draw giving a possible smoky room – at least before the stove heats up. Your damper seems to address the issue wonderfully: do you have a supplier of same?? Thanks in advance.
Hey Brian, I have been working for several years to develop and now have available a bi-pass damper for rocket mass heater, masonry cookstoves and masonry heaters. Follow the link to check it out.
Great idea guys…
I don’t have such inclement weather that would require constant heat provided to a greenhouse (although I would love to do it), but could, as Angela said, use it to heat up a varanda in the winter or make it a heated bench for the varanda (love the idea).
Question: what is the surface temperature on the bench area?
Thanks. great job!
Rom
surface temps depend on how much and how long you fire the stove. If you over-fire, yuou can get benches hot enough to be dangerous.
It also depends on how much mas you surround your channels or bell with. The thicker the mass, the lower the surface temperatures.
Dear Sirs,
I was wondering, given you’ve utilised a bell chamber (as per the free-gas-movement type school of thought), why then change to a channel based system in the bench? Is there an advantage to this that is not obvious to the layman like myself. Intuitively it would seem easier to construct another low bell using piers, much like a Roman hypocaust. What am I missing?
Your sincerely,
Ben.
We weren’t so versed in the bell design approach at the time. That said, flue liners are still a great way to create channels and generate heat exchange. I have found that bells and channels can work together.
Just wondering what this cost?
Hello from Scotland. Thank you for your excellent article. I’m always on the hunt for ways of solving our heating problems. I’m not two big young men, rather a smallish not so young woman. I’ve seen mass stoves before but not quite understood the principle. I think I can adapt your designs to build something in my veranda. We’re living in a static caravan at the moment, and every winter I threaten to get the stove sorted. It’s a confidence thing and also a resources thing, ( never have the cash). Now I know what to collect to make a thermal bench, the new old stove we’ve been lent, has a flue rather than a chimney, and will go through the side wall, and I can build the bench on the outside and heat the veranda, a warm seat and a drying room too, sorted, Angela.